A much simpler approach using a proxy ssh server is explained here HowToLoginToAWorkstation. The following is left here for educational purposes only ![]()
X2Go Client
First, get the client here http://wiki.x2go.org
In the following we assume that you are somewhere out there in the Big Bad Internet, trying to use your laptop (the localhost machine) to connect to a BIC machine called work.bic.mni.mcgill.ca (the X2Go server ) with an ip address xxx.xxx.xxx.xxx . These instructions further assume that your local box is running some kind of Linux distro, like Ubuntu or Debian or CentOS or whatever you fancy. For Mac, I guess a few modifications will be necessary, but it should not be too hard to make it work. For Windows, all bets are off. You are on your own!
We suggest that you use IP numbers rather that names as domain name resolution to IP addresses might not work reliably on you local machine.
Building a SSH Tunnel
First, we setup a password-less ssh key on your localhost . There are big caveats to such a key, security-wize. See below on how to circumvent this security threat by using a key with a passphrase and a ssh agent. This is a slightly advanced setting but once you have tested that localhost can connect to work.bic.mni.mcgill.ca reliably we strongly advise you to protect your local key with a pass-phrase. As a matter of fact, any ssh key should be password-protected!!
Generate a SSH key via the ssh-keygen command. Choose rsa or dsa but do not input a passphrase when requested for one:
$ ssh-keygen -t rsa or $ ssh-keygen -t dsa
This will create following files inside your ~/.ssh/ directory on localhost :
~/.ssh/id_dsa ~/.ssh/id_dsa.pub ~/.ssh/id_rsa ~/.ssh/id_rsa.pub
The file(s) without an extension are the private keys. You’ll need to transfer the public part of the key to the BIC login server. You do this using the ssh-copy-id command:
The following assumes that you are using a DSA (Digital Signature Algorithm) key.
$ ssh-copy-id -i ~/.ssh/id_dsa.pub user@login.bic.mni.mcgill.ca
user is your BIC account username.
It is possible but slightly more involved to setup a ssh key agent that will manage your ssh identities. More on this below.
We now setup a (ssh) tunnel to work.bic.mni.mcgill.ca . On localhost , open a terminal and type:
$ ssh -f -N -o ‘Compression=no’ -L 2222:work.bic.mni.mcgill.ca:22 user@login.bic.mni.mcgill.ca
OK, that’s quite messy! Let’s see what we have here:
The first 2 options to the ssh tunnel command have to do with backgrounding the ssh command ( -f ) and asking not to execute a remote command ( -N ). They are explained in the ssh manpage if you really want to know the all gory details: just type man ssh in any BIC session terminal.
The following option -o Compression=no is important: failure to request it will result into a doubly compressed data stream between your local machine localhost and the remote one work.bic.mni.mcgill.ca and will degrade significantly the network performance.
In the option -L 2222:work.bic.mni.mcgill.ca:22 the number 2222 is important! It can be anything you fancy but must be bigger that 1024. You will need this value later when you configure the X2Go client on you local machine.
You can replace work.bic.mni.mcgill.ca by the IP address of the workstation you are trying to use. If you don’t know it you can use any name resolution program out there: host work.bic.mni.mcgill.ca will do it for you.
Finally the number 22 cannot be modified. Use as is . It’s the port number that the remote ssh server is listening to for incoming connections.
Replace user by your BIC account username in the last argument user@login.bic.mni.mcgill.ca .
Once typed, the command prompt from your local terminal should return immediately after you provide your password (Note: a password won’t be asked if you use a ssh-agent managing your ssh key on your local machine). If not, you haven’t followed the above instructions or something between localhost and work.bic.mni.mcgill.ca is blocking and/or filtering packets, like a firewall for instance.
Test that the tunnel is properly layed out by typing in your local terminal ( user is your remote BIC username NOT your localhost username!):
ssh -p 2222 user@localhost
You should end up starting a ssh session on work.bic.mni.mcgill.ca using login.bic.mni.mcgill.ca as a tunnel.
X2Go Client Setup
Start your x2go client and select Session management in the Session drop down menu located at the top left corner, or simply type Ctrl-E . Click on New session :
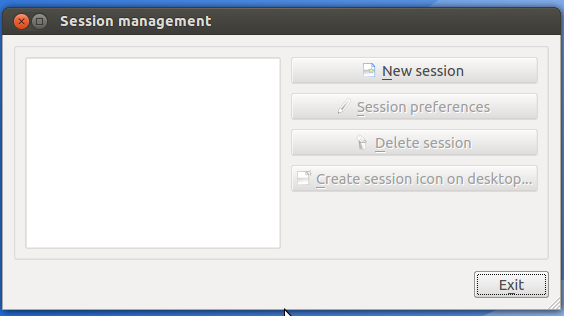
A new window will pop up. Set the following variables:
- ‘Session name’ →
work - ‘Host’ →
localhost - ‘Login’ → your BIC username
user - ‘SSH port’ →
2222

The SSH port is the value you used above when creating the ssh tunnel.
Use RSA/DSA key for ssh connection : Either manually set the path to ~/.ssh/id_rsa or ~/.ssh/id_dsa depending on the type of key you generated earlier or use the browse button to select the keyfile.
Tick the box Try auto login (ssh-agent or default ssh key) .
The defaults values for the rest of the different options should be appropriate.
Startup the X2Go client. It Should Just Work TM.
Advanced topic: SSH Key Management with Keychain .
This setup with a password-less ssh key is not ideal: your private ssh key can be stolen in the event that someone gains access to your local machine. With this private key anyone can initiate a ssh login session to the BIC using your username and this WITHOUT ANY FURTHER INFORMATION . It’s password-less, remember?
Here is a way to setup a key with a passphrase and request that a ssh key agent manages it. It requires a program called keychain (it is available on all major Linux distributions). Open a terminal on localhost and type:
$ keychain --quiet --nogui ~/.ssh/id_dsa $ . ~/.keychain/$HOSTNAME-sh
With bash as a shell on localhost , stuff this
keychain --quiet --nogui ~/.ssh/id_dsa and . ~/.keychain/$HOSTNAME-sh
at the end of $HOME/.bashrc , or whatever file you use to customize your local environment.