These instructions are meant to help accessing box.bic through means other than the web interface, which is not ideal for large file transfers. See also the Nextcloud user manual , which shows other ways to connect, from various OS’s.
These methods all work in Windows (tested) and some should work in other OS’s. For BIC Linux workstations, we now recommend rclone described in the “command line options” post lower in this thread. This is simpler and has better performance than mounting with WebDAV.
-
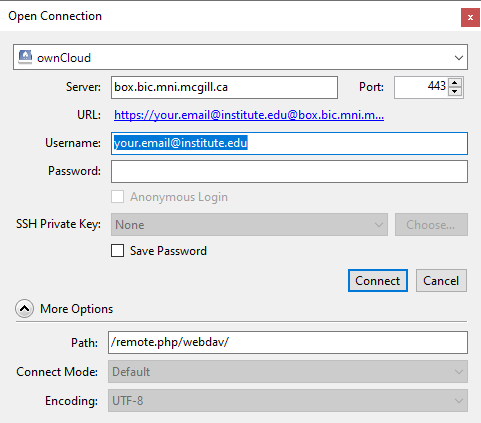
Cyberduck: A free WebDAV client for Windows or Mac, with easy installation and setup. Create a connection by clicking “Open Connection”. Select “Nextcloud” from the dropdown at the top (webdav https probably works too) and the settings as below, making sure to add the path “/remote.php/webdav/” under “More Options”.
You can save your connection as a “bookmark”. -
Nextcloud Desktop Client: This app is designed to sync both ways between the cloud and a local folder, but it can be used for infrequent downloads as described here.
During initial setup, click “log in” and enter https://box.bic.mni.mcgill.ca/
Then “log in” again.Then your user name (email) and password.
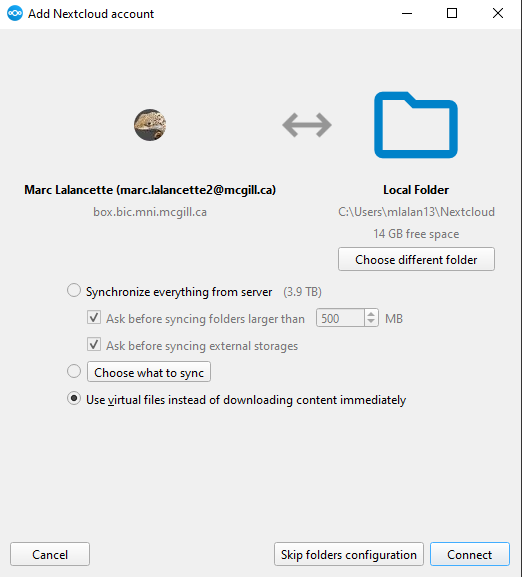
Then “Grant access”. It will then show “Account connected” and the Nextcloud client will react a few seconds later, displaying this folder configuration window:
You can set it up now, or change it later. We’ll proceed as if you skip this initial configuration.
The client window is a small pop-up above the Nextcloud taskbar icon.To create or edit a sync configuration, right click on the Nextcloud taskbar icon, and select “Settings”. Or in the app window, click on your account at the top left and select “Settings” there.
On the left, select your account with box.bic, then click “Add Folder Sync Connection”Pick the “source” (local) folder, then the “destination” (server) main folder you wish to download. You can select specific subfolders and files in the next step. It may take time to populate the display of subfolders on the server.
Uncheck “Use virtual files” to minimize unnecessary server interactions when you only need to download files.
Click “Add Sync Connection”. The files will start downloading.
Before closing the settings window, you can disable “Launch on system startup” from the General tab if you’re only downloading once. You can then monitor the download progress and status from the taskbar app. -
Windows Explorer
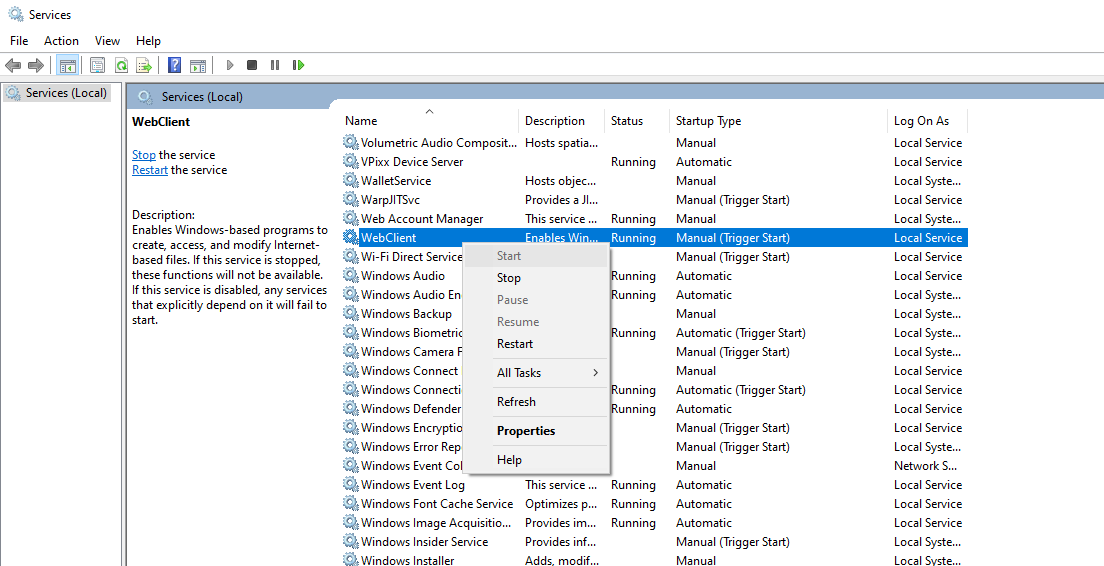
From Windows’ Start Menu, type services and open the Services App. Scroll down to WebClient and if its status is not “Running”, right click it and select “Start”.
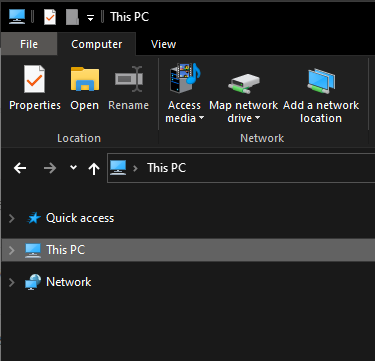
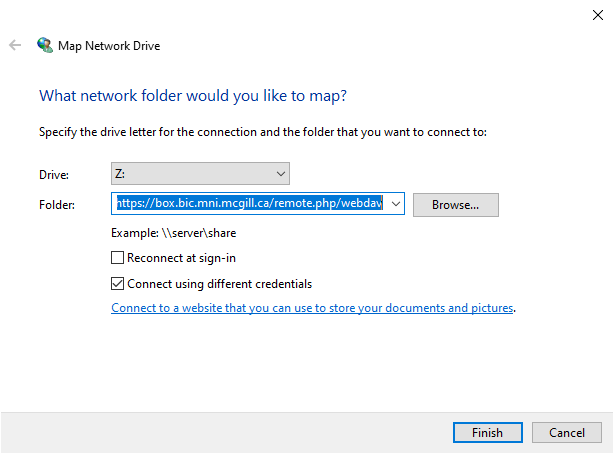
In Windows Explorer, click “This PC” in the left pane, then “Map Network Drive” in the menu ribbon.
Enter: https://box.bic.mni.mcgill.ca/remote.php/webdav as “Folder”, and check “Connect using different credentials”.
It may take a few seconds after clicking “Finish” for another window to appear asking for your username/password.
if you get an error like “path not found”, open Regedit and verify that the following key has a value of 1 (or 2).
HKEY_LOCAL_MACHINE\SYSTEM\CurrentControlSet\Services\WebClient\Parameters\BasicAuthLevel (DWORD32) = 1 -
Alternately, if you prefer the command line and are familiar with Regedit:
Add this Windows’ registry key:
HKEY_LOCAL_MACHINE\SOFTWARE\Microsoft\Windows\CurrentVersion\Policies\System\EnableLinkedConnections (DWORD32) = 1
Reboot.
Then from a command terminal:
net use z: \\box.bic.mni.mcgill.ca@SSL\remote.php\webdav\ /user:your.email@institute.edu "your password"